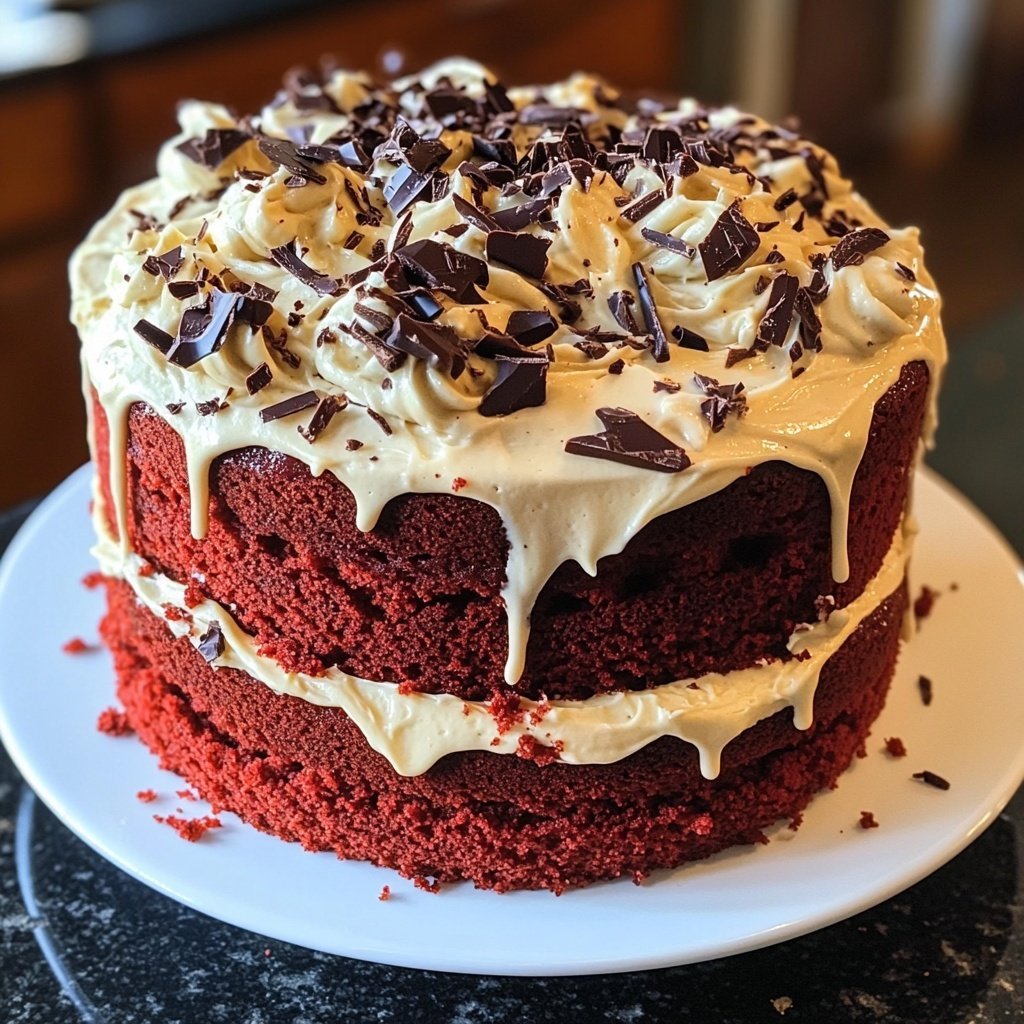
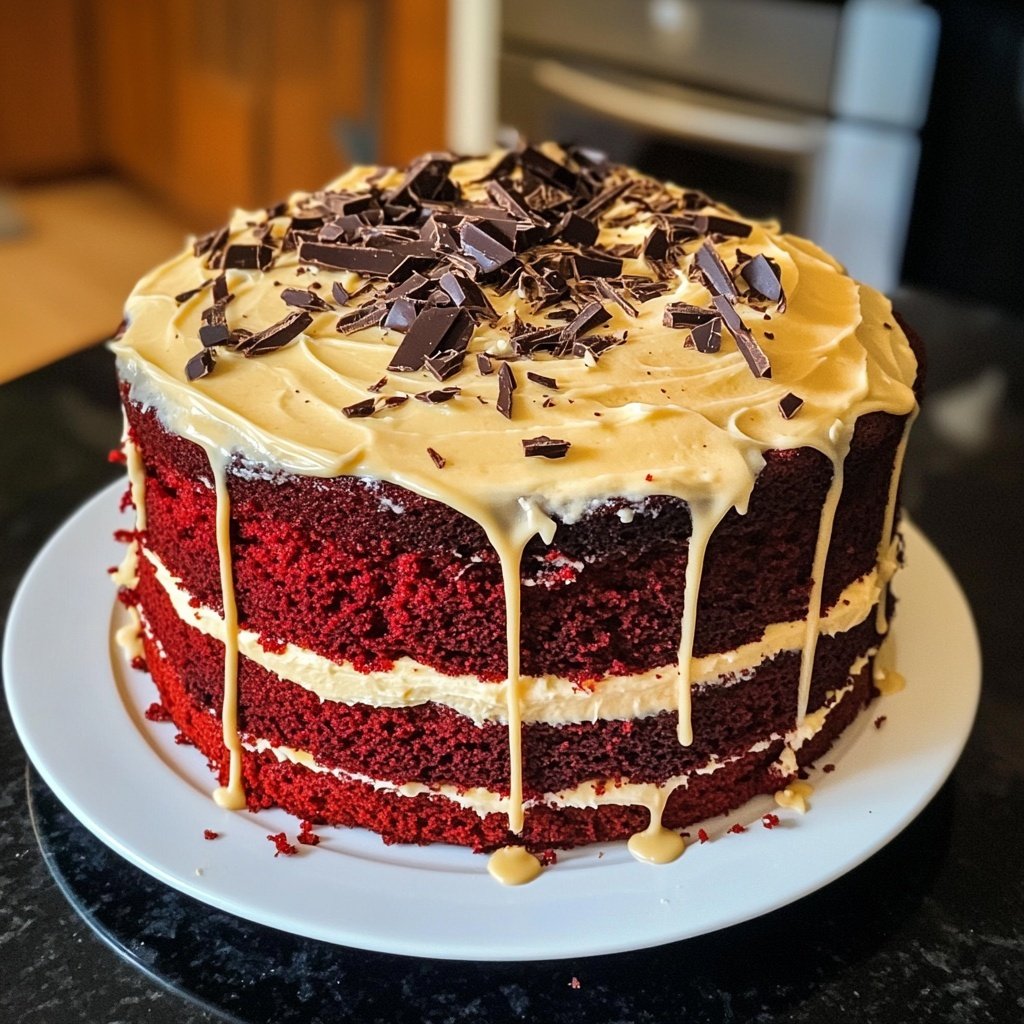
Red Velvet Cake
Highlighted under: Baking & Desserts
Indulge in the rich and vibrant flavors of this classic red velvet cake, perfect for any celebration or sweet craving.
This red velvet cake is a timeless classic that brings a touch of elegance to any occasion. Its unique flavor, combined with the striking red color, makes it a favorite for birthdays, weddings, and special celebrations.
Why You'll Love This Red Velvet Cake
- Rich chocolate flavor paired with fresh orange zest
- Creamy texture that melts in your mouth
- Perfect for celebrations or as a sweet indulgence
The History of Red Velvet Cake
Red velvet cake has a rich history that dates back to the early 20th century. Originally, it was known as 'red cocoa cake', and the vibrant color came from a reaction between the cocoa powder and acidic ingredients like buttermilk and vinegar. Over the years, this cake has evolved, becoming a beloved dessert in many households, especially in the Southern United States.
Its distinctive red hue has made it a favorite for special occasions. The cake's unique flavor profile, which combines a mild chocolate taste with a hint of tanginess from buttermilk, sets it apart from traditional chocolate cakes. This delightful combination has captured the hearts of many, making red velvet cake a staple at weddings, birthdays, and holidays.
Pairing Suggestions
Red velvet cake pairs wonderfully with a variety of beverages. For a classic touch, serve it with a glass of cold milk or a rich cup of coffee. The creaminess of the milk enhances the cake's texture, while the bitterness of coffee complements its sweetness perfectly.
For those who prefer tea, a fragrant Earl Grey or a smooth chai can elevate your dessert experience. Additionally, consider pairing this cake with a scoop of vanilla ice cream for a delightful contrast in temperature and flavor. The creaminess of the ice cream beautifully balances the cake's richness.
Storing and Serving Tips
To keep your red velvet cake fresh and delicious, store it in an airtight container at room temperature for up to three days. If you need to store it for a longer period, consider refrigerating it. When refrigerating, wrap the cake tightly in plastic wrap to prevent it from drying out. Properly stored, it can last up to a week in the fridge.
When it comes time to serve, let the cake sit at room temperature for about 30 minutes before slicing. This will enhance its texture and flavor. For an extra touch, garnish each slice with fresh berries or a drizzle of chocolate sauce to add a pop of color and flavor contrast.
Ingredients
Ingredients
For the Cake
- 2 1/2 cups all-purpose flour
- 1 1/2 cups granulated sugar
- 1 teaspoon baking soda
- 1 teaspoon salt
- 1 teaspoon cocoa powder
- 1 1/2 cups vegetable oil
- 1 cup buttermilk, room temperature
- 2 large eggs, room temperature
- 2 tablespoons red food coloring
- 1 teaspoon vanilla extract
- 1 teaspoon white vinegar
For the Cream Cheese Frosting
- 1 cup unsalted butter, softened
- 8 oz cream cheese, softened
- 4 cups powdered sugar
- 1 teaspoon vanilla extract
- 1-2 tablespoons milk (as needed)
Make sure all your ingredients are at room temperature for the best results.
Instructions
Instructions
Preheat the Oven
Preheat your oven to 350°F (175°C) and grease two 9-inch round cake pans.
Mix Dry Ingredients
In a large bowl, sift together the flour, sugar, baking soda, salt, and cocoa powder.
Combine Wet Ingredients
In another bowl, whisk together the oil, buttermilk, eggs, food coloring, vanilla extract, and vinegar.
Combine Mixtures
Gradually add the wet ingredients to the dry ingredients, mixing until well combined.
Bake the Cake
Divide the batter evenly between the prepared cake pans and bake for 30 minutes, or until a toothpick inserted in the center comes out clean.
Cool and Frost
Allow the cakes to cool in the pans for 10 minutes before transferring to wire racks to cool completely. Once cooled, frost with cream cheese frosting.
Decorate the cake as desired and enjoy!
Pro Tips
- For a richer flavor, consider adding a tablespoon of espresso powder to the batter.
Tips for Baking Success
When baking a red velvet cake, precise measurements are key. Use a kitchen scale for accuracy, especially with flour, which can be compacted and lead to a denser cake if too much is used. Additionally, ensure that your ingredients are at room temperature, as this helps achieve a uniform batter that rises beautifully.
Don't skip the vinegar! It not only reacts with the baking soda to create lift but also enhances the cake's flavor profile. The combination of vinegar and buttermilk is essential for that signature tangy taste that red velvet cake is known for.
Customizing Your Cake
Feel free to get creative with your red velvet cake! You can add different flavorings to the cream cheese frosting, such as citrus zest or a splash of almond extract, to give it a unique twist. For a fun and festive touch, consider incorporating sprinkles or edible glitter on top of the frosting.
If you're looking to reduce sugar, you can substitute some of the granulated sugar with a sugar alternative, but be mindful as it may alter the texture. Another option is to make mini red velvet cupcakes for easier serving and portion control, especially at parties.
Questions About Recipes
→ Can I make this cake ahead of time?
Yes, you can bake the cake layers a day in advance. Just wrap them tightly in plastic wrap and store them in the fridge.
→ What can I substitute for buttermilk?
You can make buttermilk by mixing 1 cup of milk with 1 tablespoon of vinegar or lemon juice and letting it sit for 5 minutes.
→ How should I store leftover cake?
Store leftover cake in an airtight container in the refrigerator for up to 5 days.
→ Can I freeze this cake?
Yes, you can freeze the cake layers. Wrap them tightly and store them in the freezer for up to 3 months.
Red Velvet Cake
Created by: The Novarecipelab Team
Recipe Type: Baking & Desserts
Skill Level: Intermediate
Final Quantity: 8 servings
What You'll Need
For the Cake
- 2 1/2 cups all-purpose flour
- 1 1/2 cups granulated sugar
- 1 teaspoon baking soda
- 1 teaspoon salt
- 1 teaspoon cocoa powder
- 1 1/2 cups vegetable oil
- 1 cup buttermilk, room temperature
- 2 large eggs, room temperature
- 2 tablespoons red food coloring
- 1 teaspoon vanilla extract
- 1 teaspoon white vinegar
For the Cream Cheese Frosting
- 1 cup unsalted butter, softened
- 8 oz cream cheese, softened
- 4 cups powdered sugar
- 1 teaspoon vanilla extract
- 1-2 tablespoons milk (as needed)
How-To Steps
Preheat your oven to 350°F (175°C) and grease two 9-inch round cake pans.
In a large bowl, sift together the flour, sugar, baking soda, salt, and cocoa powder.
In another bowl, whisk together the oil, buttermilk, eggs, food coloring, vanilla extract, and vinegar.
Gradually add the wet ingredients to the dry ingredients, mixing until well combined.
Divide the batter evenly between the prepared cake pans and bake for 30 minutes, or until a toothpick inserted in the center comes out clean.
Allow the cakes to cool in the pans for 10 minutes before transferring to wire racks to cool completely. Once cooled, frost with cream cheese frosting.
Extra Tips
- For a richer flavor, consider adding a tablespoon of espresso powder to the batter.
Nutritional Breakdown (Per Serving)
- Calories: 380 kcal
- Total Fat: 26g
- Saturated Fat: 15g
- Cholesterol: 195mg
- Sodium: 85mg
- Total Carbohydrates: 32g
- Dietary Fiber: 3g
- Sugars: 24g
- Protein: 6g